Sunday 4 December 2016

3D Printing Final Object


This project was produced in partner ship with a fellow student at the Alberta College of Art and Design. Caffrey's blog will have a more in depth analysis of his objects for this project most likely, which can be found here. http://threedobjectdesign.blogspot.ca/

This project was the process of taking two separate designs and mashing them together much like a few previous assignments that we have done. Where concept generation is the key and then amalgamating them is the final stage in completion. This time we have actually printed them out with a 3D printer and created an object that has to follow rapid prototyping rules and guidelines. The end result is a 3D shape.The expectation was to map out the form, function, 3D print-ability and whether it is self-supporting.


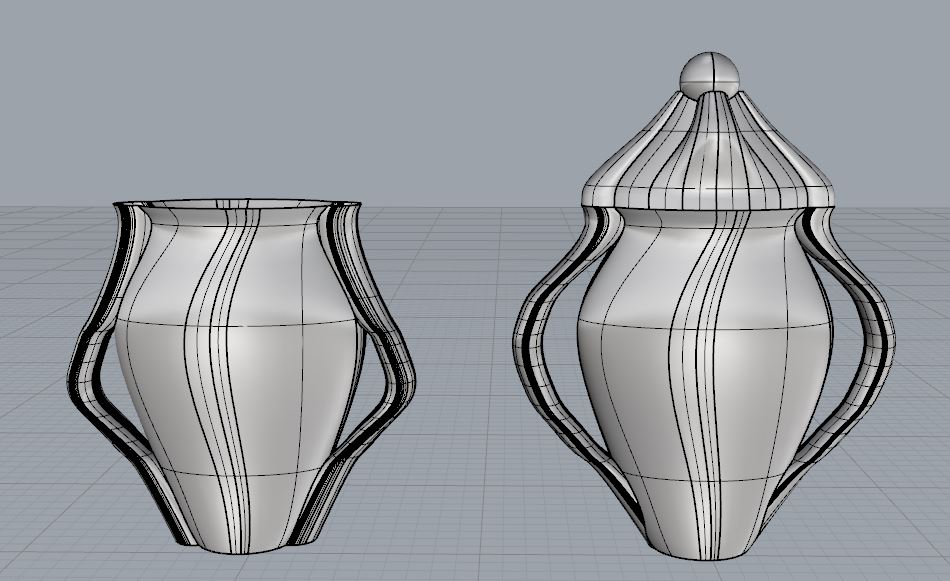
The Two shapes on the right are the original shapes that created our 3D printed model, the combination of both mine and Caffrey's work in our concept generation before this project.


Due to some scheduling conflicts and some difficulties with the printer for previous groups our teacher helped out a lot to get as many people through their projects. The way that we managed to figure out our project had already been completed for us was when we showed up to do a print. The original issues with our designs  was that it was to tall which was simply fixed by concentrically resizing it. the other issue we had was with the printer which our teacher had previously trouble shot. The issue was that once it got to a certain point it would either fair because it stopped extruding or it would melt at the top. The solution was to make two objects and give the material some time to cool because the circumference was so small. The completed project is rough and we ended up with 4 completed ones because we decided we wanted to try printing in clear plastic again. Also we wanted the experience ourselves for the future.

This is the completed design in clear plastic it has some minor deoformaties because there where two pieces as well as they are also very compact while still being hollow.

3D Print Hybrid Design Process

This project was produced in partner ship with a fellow student at the Alberta College of Art and Design. Caffrey's blog will have a more in depth analysis of his objects for this project most likely, which can be found here. http://threedobjectdesign.blogspot.ca/

 
This project was the process of taking two separate designs and mashing them together much like a few previous assignments that we have done. Where concept generation is the key and then amalgamating them is the final stage in completion. This time we will actually print them out with a 3D printer and create an object that has to follow rapid prototyping rules and guidelines. The end result will be a complete 3D shape.The expectation is to map out the form, function, 3D print-ability and whether it is self-supporting.

The shapes that have been generated for my project just focus upon the loft command in rhino with a much more organic and pottery like shape. Their roundness and gradual movement in form allows for the 3D print to actually be completed as a shape. (See my previous blog posts)
 

While mine are very Organic in structure Caffrey's are a bit more modeled and shaped and using a few more tools in rhino to create the partterning.


When we went through theses three sets of designs together there where a few differences of opinion upon the best way to approach this. Being as that was the case we both  just took a class to remodel them into objects that we where more satisfied with. I had created only 2 mashups however Caffrey created about 5 (See his blog http://threedobjectdesign.blogspot.ca/) 

These are my two shapes using more of the tools that Caffrey used.
 

After going through about 10 different shapes and iterations we had a few designs that seemed to be well put together and may be able to print. The final design was Caffrey's It included an altered design of the 3 main designs shown above, the ones that got put together where the ones on the right. These 2 design mad for a challenge and they where very dissimilar.